20 & 21 August 2011
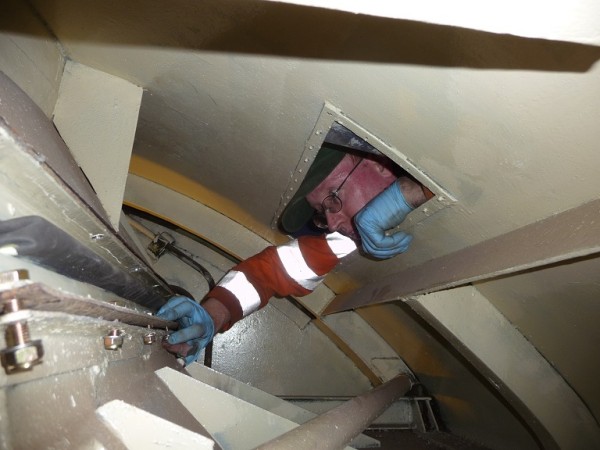
Saturday 20th August Attendance 4: Today was set aside to get the CoBo into position ready for being lifted from its bogie’s in September including disconnecting the last items, these being the hand brake linkages and the bogie pivot nuts. Adam and Jason arrived first and a short while later Chris B and Matt Sumners turned up. The first job of the day was to shunt the CoBo into position from where it is going to be lifted. However this wasn’t as straight forward as it sounds as there were DMU cars in the way, plus a class 37 and the Class 40 Preservation Society’s coach in the way. So it was decided that Jason, Chris and Matt would deal with the shunt and they went off to source a Class 08. Adam on the other hand made use of the time by completing the drelling of the door for the electrical cubicle. Adam had taken it off site previously but while drelling it Adam’s angle grinder decided it didn’t want to work anymore. Adam set up an angle grinder outside and drelled the door back to bare aluminium, this not taking very long as the old paint was flaking off already. With the drelling complete the door was given a dusting off and wiped down with a cloth soaked in white spirits readying it for a coat of etch paint. With that completed Adam went round and joined the rest of them and assisted with the shunting that was taking place. In a fairly complex shunting operation 1 DMU set was moved to a siding then the other DMU set was moved to a different siding then the Class 37 and the C40PS coach were pulled out and placed in front of the CoBo then once coupled up the CoBo was placed down the bottom of the siding and the 2 sets of DMU’s were replaced. By this time it was late morning so it was decided to have a cup of tea….. Following the brew Matt disappeared off to continue with other work. Chris and Jason would spend the rest of the day working on Ernest and Adam assisted for an hour or so until lunchtime. Following lunch Adam returned to working on the ‘Object’. Underneath each of the bogies of the loco there is a handbrake linkage and also the nut that holds the bogie onto a pivot. These both need to be disconnected so Adam selected the appropriate tools for the job went round to where the CoBo was located and set about undoing the various bits. This involved climbing under the bogie’s into a cramped area next to the traction motors. The Co end was tackled first and the handbrake linkage was first. The linkage has a joint that is held together with two castle nuts with split pins through. The split pins didn’t look to be in very good condition and with two spanners pressure was applied and as expected the split pin didn’t put up much resistance and the nut moved. The first nut and bolt were removed and with pressure applied to the second nut and bolt the same thing happened, the split pin broke and the nut was removed. With the joint disassembled Adam removed the shaft of the handbrake linkage and reassembled the end as it was in two parts following the removal of the two sets of nuts and bolts. Next up was to remove the pivot nut, these had been checked previously and where known to be on hand tight so Adam removed it by hand after cutting a cable tie that had been used to stop the nut undoing. With that complete the Co end was fully disconnected. Adam then turned his attentions to the Bo end. The same process was followed as the Co end. The handbrake linkage was dismantled, the shaft removed and the joint was reassembled and put to one side ready to be moved for storage until its required again. The pivot nut was removed as again this one was on hand tight and this will be placed into a safe place ready for when they are needed again. Next up for Adam was to retrieve two vacuum tank straps for Ernest and also a cover that had been removed from the Electrical Cubicle door and to drell them back to bare metal. Adam again set up outside to do this and the job only took 20 or so minutes to complete. The metal work was then given a wipe down with a cloth soaked in white spirits and then they were given a coat of green anti rust paint and hung in the coach to dry. At the same time Adam sprayed the electrical cubicle door with aluminium etch paint. One last job that needed to be completed was the removal of a pipe on the air system as it sits very close to the end of the Bo bogie and it was thought it could get damaged during the lift so it was felt that removing the pipe would be a safer option. This required a set of Stilsons pipe wrenches that Adam had with him. He attached them to the join at one end where the pipe feeds into an air tank and applying some pressure the nut moved much to Adam’s surprise as the pipe work had been untouched for a lot of years! With one end loosened off Adam made a start on the other end of the pipe. This end proved to be a bit more troublesome but finally with Adam applying some body weight to the Stilsons the nut moved and was soon loosened off. Both ends of the pipe were disconnected then and the pipe was removed. With this job completed Adam tidied up the tools and the parts and took them back to the coach. And that brought the day’s proceedings to an end……….
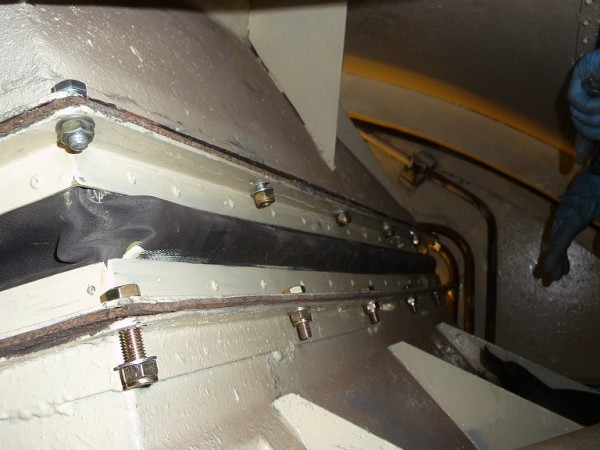
Sunday 21st August Attendance 2: Today Jason would spend the morning working on Ernest finishing off a few jobs around the brake frame. So Adam was left to continue with CoBo related work. First up was to apply a coat of undercoat to one side of the door that had been drelled and sprayed with etch paint the day before. So armed with a brush and having given the undercoat a good mix Adam applied a coat of the light grey undercoat to one side of the door. Once the undercoat has dried then the door will be turned around a coat can then be applied to the other side. While Adam had the paint out he applied a coat of undercoat to the separate door panel and also to the vacuum tank straps from Ernest that he had drelled and painted green the previous day. These were then hung up to dry in the coach. Another job for the day was to check that the lifting lugs could be pulled out of the CoBo body. A high tech piece of equipment was required and this consisted of two large cable ties connected together at one end. The cable ties were then thread through the handle and then with a heave the first lug came out. Two of the three other lugs came out now problem but one was a bit stubborn. This was due to the fact that there was some rust that was blocking the lug and once the rust was removed the 4th lug was pulled out. The internal doors are nearing completion of their renovation but the hinges, bolts and latches/locks haven’t been dealt with so far so Adam decided that it was time to start cleaning them all up. First up the hinges were dealt with. These were covered in paint and grime and in some cases they had seized. The hinges were sprayed with brake cleaner first which was allowed to soak into the grime. After a few minutes they were wiped down with a cloth. Then Adam loosened up any of the seized hinges with some DW40 and manipulating the hinges. With this completed it was time to clean the hinges up of the old paint on them. This would be done using a brass wire wheel on an angle grinder as the hinges are made of brass and so it wouldn’t damage them. One half of the hinge was gripped in a vice and the brass wheel run over the hinge removing all of the old paint. Then the hinge was turned around and the wheel was run over the other half. This produced a nice shiny hinge. The rest of the hinges were put through the same treatment and they all came up looking nice and shiny and new. Next for treatment were the bolts that were used for connecting the hinges to the doors and walls. They were put through a similar process. A table mounted wire wheel was used and all of the crud and muck that had accumulated over the years in the threads and in the screw heads were removed, the bolts were coming up as good as new. After a while of working through the bolts Jason came back to the coach and it was decided to stop for lunch….. Jason had finished what he was doing on Ernest so after lunch it was decided to make a start refitting the second cooler group baffle, Rob M having fitted the other one previously. Jason selected the correct spanners and sockets required for the nuts and bolts and Adam carried the baffle around to the CoBo. The frames of the bellows are fitted with a cork gasket and within the cooler group the metal surfaces still had remnants of the old gasket so this needed scraping off. So armed with a scraper Jason had a go and scraping the old gasket off but didn’t have much luck. Following a quick chat it was decided to have a go with a wire wheel on an angle grinder so Adam went and fetched one. On Adam’s return with all of the relevant PPE Jason tackled the gasket removal and this proved to be a lot more successful. The surfaces were soon cleaned up. Next job was to partially fit the bellows to make sure that the wholes lined up with those in the cooler group and after a couple of attempts a good fit was found or so they thought…… Some sealant was spread over the bottom flange and the baffle frame was placed in to the sealant, Adam and Jason then placed a few bolts through the holes and they were tightened up. Then they tried to get the holes in the top frame and the top flange to line up but they were a long way out. The bellows had been cabled tied so that the rubber was compressed so that they could be fitted, after a lot of head scratching and discussion it was decided that because of the cable ties it may be knocking the alignment of the holes out so more sealant was applied in the hope that this resolved the issue and some bolts were placed into the holes of the top frame. This didn’t go to plan as the holes still didn’t line up! However with some perseverance all but two holes lined up. Bolts were added to all of the holes and were tightened. The two that didn’t line up were drilled out and then when these were bolted up Adam and Jason tidied up the tools. It’s hard to realise how long this job actually took and everyone involved in the fitting of both cooler group baffles hope that it will be a very long time before this job has to be tackled again. And this brought to an end another successful CoBo working weekend……. The next working weekend is October 15/16. If you wish to lend a hand please contact Chris Tatton |
 |
| Above : The CoBo being shunted into place. © C15PS |
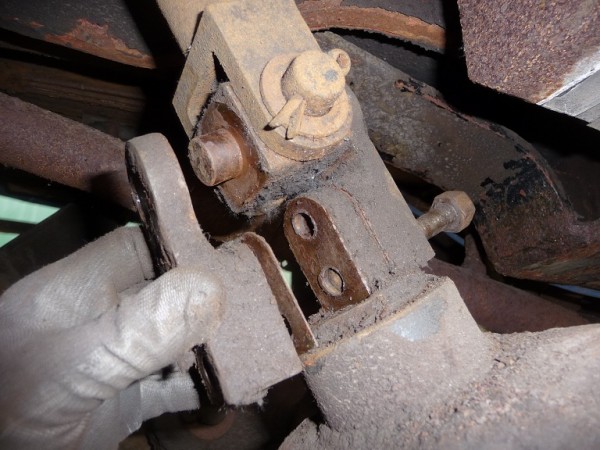 |
| Above : One of the handbrake lingages being dismantled. © C15PS |
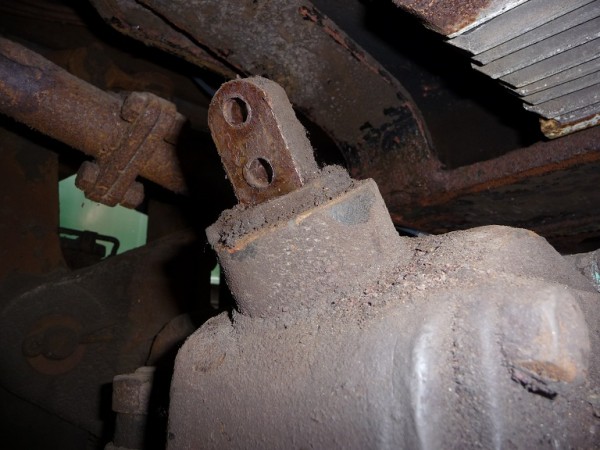 |
| Above : Once the handbrake linkage has been removed. © C15PS |
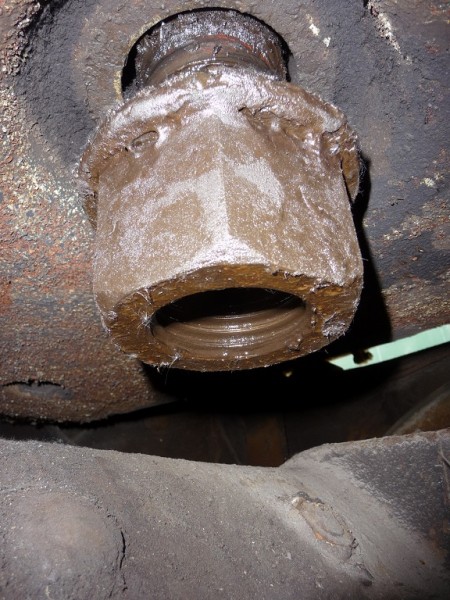 |
| Above : One of the bogie nuts in the process of being removed. © C15PS |
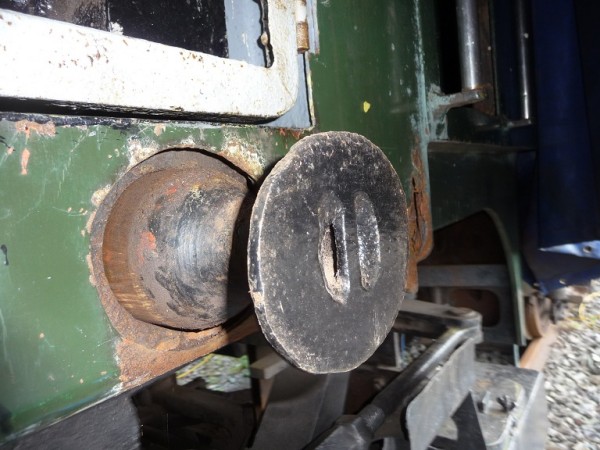 |
| Above : One of the lifting lugs pulled out. © C15PS |
 |
| Above : Jason fitting some of the nuts and bolts. © C15PS |
 |
| Above : And the bellow fitted and the final couple of nuts and bolts to be tightened up. © C15PS |
Fancy Getting Involved? click on the You Can Help page