11th June 2011
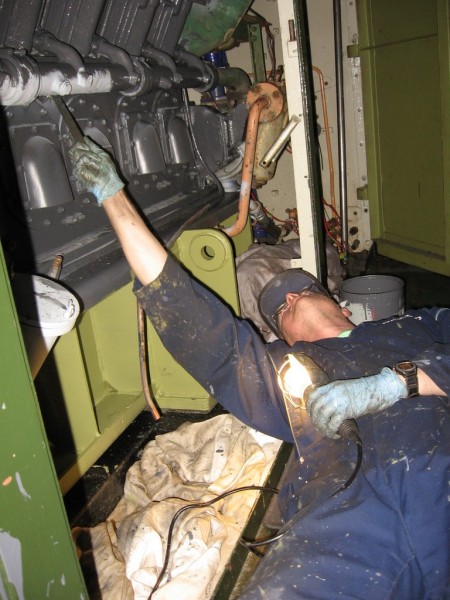
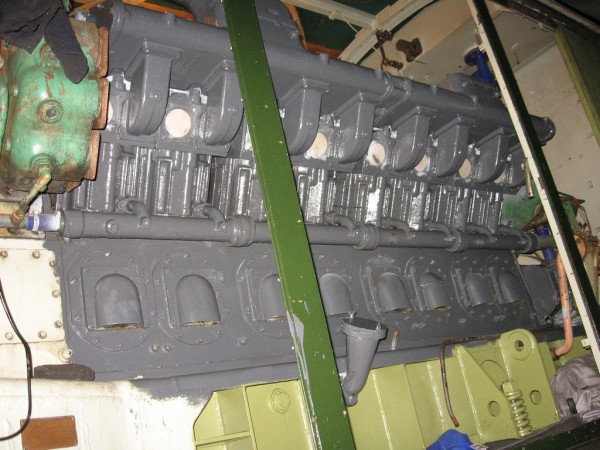
Saturday June 11th 2011 Attendance: 1 With the overhaul work on D9531 reaching its climax and with the rest of the working party for this weekend not arriving until the Sunday, Jason today had been given the choice to work on which ever loco he saw fit, and as this weekend was supposedly a scheduled D8233 weekend he decided that he would get back into the swing of working on the class 15, in a recent project meeting the restoration plans for all the locos in the care of the C15PS over the next 6 months had been laid out and for the class 15 the immediate task at hand was to complete the engine repaint so that the R/H exhaust system could be re-fitted. It had been Jason’s task to do the engine repaint and thus far the L/H side of the engine has been done but the R/H had not been touched, over the last 6 months Jason has had little to do with the progression of the engine repaint as he had been one of the team helping out on D9531, however others had made a start on the repaint, Andy Walton came down in March and had done the needle gunning and in the following months Rob Mason had dropped onto the 15 on occasions and made a start on the primer and undercoating but with Jason planning a working week in early July to get the R/H exhaust system refitted (a job that took a full week last year) it was imperative that the painting for the side of the engine be completed by then, so Jason arrived on the Saturday morning full of enthusiasm to get cracking on the engine painting. The first task was to appraise the situation and see what was what; As was mentioned before part of the engine has been painted already that being around half of the inlet manifold in Acid Etch (as it is made of Aluminium) and the crankcase covers has been both primed and undercoated, the rest of the side of the engine however was simply needle gunned and had been left bare and as such some mild surface rust was starting to form mostly on the lower coolant pipe. Jason wasted no time in binging through the cans of Acid Etch spray paint that he had brought, he then sprayed the remainder of the inlet manifold before deciding to also paint the exposed cylinder heads and cylinder water jackets as well as the lower coolant pipe after he had skimmed over it with the wire wheel to scrub off the surface rust, the last bit of etch paint being applied to the oil filler pipe sticking out of the side of the bed frame. The next task was to primer paint the bed frame, this is a tricky operation as the box like structure has some recesses like towards the rear and around the front mounting foot that was difficult to get at. Jason made use of one of the angle brushes which made the task a little easier. Towards the front of the engine is the oil priming pump motor which is mounted between the engine and the outer casing, this made for some tight access to paint the forward recesses of the bed plate, by the time this task had been completed it was after midday and Jason stopped for lunch. After lunch the green anti-corrosive primer was till drying off so Jason decided to do something else to pass the time for a bit, he then noticed the flywheel timing mark indicator sitting on top of one of the generator mountings, this had been removed during the start-up last June as the split pins that had been fitted to the castellated nuts on the flywheel adaptor disc had worked loose and had been striking the timing indicator, this had been removed to provide clearance for the pins and prevent any further damage, but now in order to refit the timing mark the split pins would have to be re-secured. Using a collection of bars and screwdrivers Jason reoriented each split pin by 90 deg so that it located in the castellation slots correctly then he trimmed back one of the pin tails before bending the short tails down the side and the long tails over the top of the nuts, he had to bar round the crankshaft so as to access each pin in turn, but once they were all done he refitted the timing indication then barred the engine round one more revolution to double check that the pin clearances were ok. By now the engine was ready for under coating so Jason got out the tin of the thick grey undercoat and staring at the top worked his way down the engine painting as he went, however when he reached the bedplate he found that the green primer still had not dried so he had to call it a day on the loco and packed away all the paint and tools and tied the tarp back up on the loco. As this was not the end of the day he decided to go up to the storage and get the flywheel guards. These are metal mesh covers that bolt onto the generator and prevent people from sticking anything into the spinning flywheel when the engine is running, after some difficulty he managed to locate and dig out the flywheel guards and drove back to Baron St, it had been a good day and nice to get some work done on the 15. The next working weekend is July 9/10. If you wish to lend a hand please contact Chris Tatton |
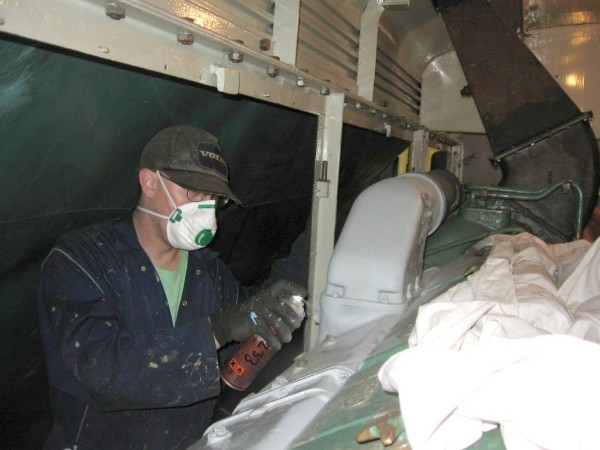 |
| Above : Jason applying Acid Etch to the engine casing. © C15PS |
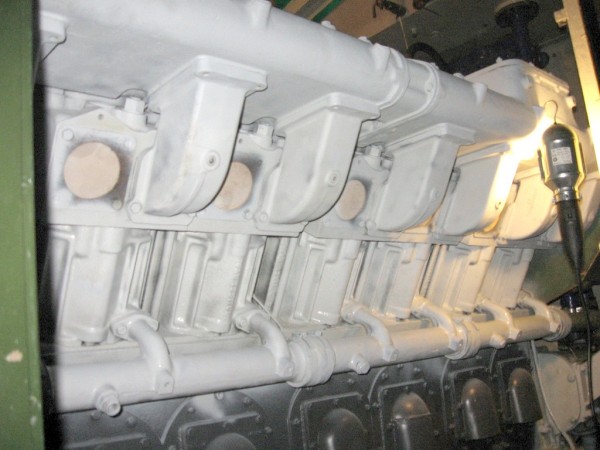 |
| Above : Ready for undercoating. © C15PS |
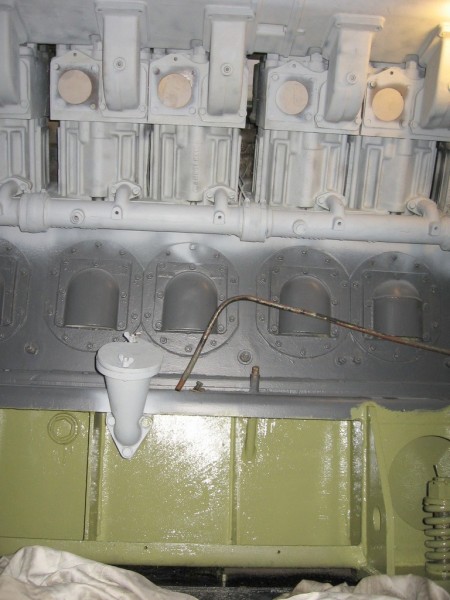 |
| Above : Ready for undercoating. © C15PS |
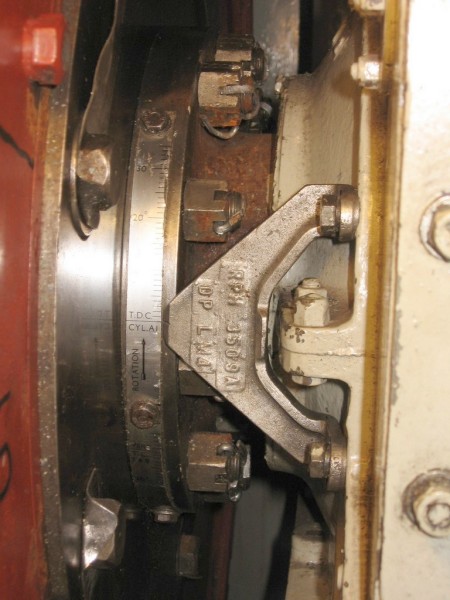 |
| Above : Trimmed back split pins on the flywheel. © C15PS |
 |
| Above : Undercoating those awkward bits! © C15PS |
 |
| Above : A days work complete. © C15PS |
Fancy Getting Involved? click on the You Can Help page