1-2 December 2012
Saturday 1st December 2012 Attendance: 5 Team Jim – consisting of Kris, Graham and David continued with the welding of the traction motor ducting no as simple as it sounds, After a discussion around a nice warm cup of coffee a start was made on marking the steel out to the templates created. Care was taken these as they required careful shaping into a curve to ensure the fitted the sides welded the previous week. Once cut two new templates were created for the correct curvature and a trip to Buckley Wells followed to use the forming machine. The forming of the two steel sheets took up nearly half an hour as we did not want to spend all day walking backwards and forwards. Once back at the coach the two steel pieces were subjected to small technical adjustments with size 8 boots and a lump hammer, now that they fitted, a start was made on welding these into place. The bottom plate was carefully fitted and positioned by using blocks of wood to ensure that welding would go smoothly. After another coffee to warm ourselves up, a star was made by tacking the sheet in place, then as we started to weld the welder decided to stop working. The next 30 minutes was spent onto the technical support team (Jim) and eventually the fault was identified that the wire had welded its self to the inner tip. Once the problem was identified the solution was simple, find a replacement tip and continue on, finding the tip was easier said than done, especially when you looking for something metal approximately one inch long in amongst many other items that look similar. A further phone call was taking place to the technical support team saying we could not locate one when Kris appeared with one in his fingers sounding like he was holing a rollover wining lottery ticket. After a break for lunch Kris, Graham and David all had goes at welding to varying degrees of success, however we knew that these would be quality assured the following week by the welding guru Jim. Whilst this was taking place those no welding the rest got on with a bit of tidying up. Once the bottom and top were welded in place, darkness has set in and the long journey home beckoned. Jason meanwhile continued his task of restoring the 2” Vacuum Pipework system to D8233, today he began checking the length of the vertical pipe that connects the Vacuum valve gear mounted on the cab bulkhead to the pipe that passes through the bulkhead to the 2” pipework in the cab, the original pipe for this was found to be too long and Jason had to cut it down and extend the threads at one using the Threading machine that he had again borrowed from Buckley Wells shed, when Jason came to refit the modified pipe, Stephen Smith arrived to give Jason a hand, next the bulkhead holes for the L/H mounting bracket of the Vacuum cut off valve had to be re-drilled at the original holes didn't line up, with Stephens help the holes were drilled and the new bolts were fitted, next Jason decided to make a start on the repairing the “Gas Axe Gap” this is in the 2” pipe under the frames (above the R/H battery box) where some clever dick as an act of deliberate sabotage cut out a short length of the Vacuum train pipe to the front buffer beam with an oxy/acetylene cutting torch to prevent the loco creating a vacuum in its vacuum brake system, first job was for Jason to use the reciprocating saw to cut off the knobbly ends of the gas axe cut, he then carefully measured and cut a gap in the pipe of 9 ¼ inches, next Stephen went down the front length of the pipe and unbolted all the clamps where it passed through the under frame cross members, Jason drelled up the new cut ends of the gap, and then moved to the front to use the 2” Die nut to clean off the rusty threads of the Trip cock outlet pipe, before removing the clamp securing it and attached some bits of pipe and angle fitting to form a handle with which to move & rotate the pipe with however the pipe was refusing to budge at this time so Jason & Stephen called it a day. Sunday 2nd December 2012 Attendance: 2 Jason began the morning by cleaning up & refurbishing 2 vac bag clamps, he then got together the Welder & associated gear and loaded them into the hand trolley for the trip around to the loco in the works. Once there Jason set up to weld on the stand pipe for the L/H exhauster silencer outlet. While Jason was doing this Stephen arrived and after Jason had finished welding up the pipe he moved into the cab to put tack welds on the captive nuts he they had installed for reposition Cut off valve mounting bracket. Stephen applied some primer paint to the newly welded on pipe, paint which was the consistency of glue due to the cold! Next it was back to the task of repairing the gas axe gap; after adjusting the clamps so they would fit the short 13” vac bag that had been purchased especially to bridge the gap in the pipe, Jason & Stephen then set about removing the remainder of the bolts holding the pipe clamps on, then they removed the clamps also, this freed up the pipe sufficiently that it could be pulled forward enough so that the short vac bag could be installed onto the pipe, the cuffs of the vac bag slid over the pipe nice and easy thanks to some slight lubrication with Vaseline, the front section was then pushed back into place sliding into the other end of the vac bag thus bridging the gap. Jason & Stephen then refitted & secured all the pipe clamps and the Gas Axe Gap is now fully repaired. Next Jason used some pipe threading compound he had bought that smells like window putty, and liberally applied it to the male threads of the R/H front trip cock outlet pipe and then a blanking cap was tightly screwed on using the large stilsons. Finally it was onto the opposite trip cock outlet pipe on the L/H rear of the loco, this one was very close to one of the bogie chains, once the chain & shackle had been removed Jason again used the 2” Die nut to clean out the threads which were twice and bad at this end than the other. It was awkward to get onto the die nut with the stilsons due to the close proximity of the sole bar and chain shackle mounting eye but after a bit of perseverance the threads were cleaned up sufficiently to allow the fitting of the blanking cap again with a lashing of pipe threading compound for good measure, by which time it had got dark outside so the guys called time on proceedings. If you wish to lend a hand please contact Chris Tatton |
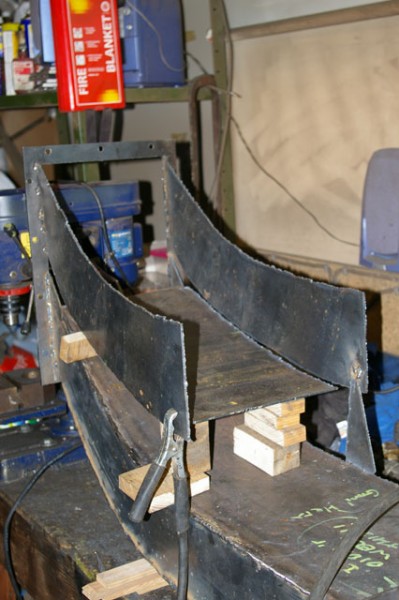 |
| Above : The basic form of the No2 end TMB duct is starting to take shape on the workshop bench. © C15PS |
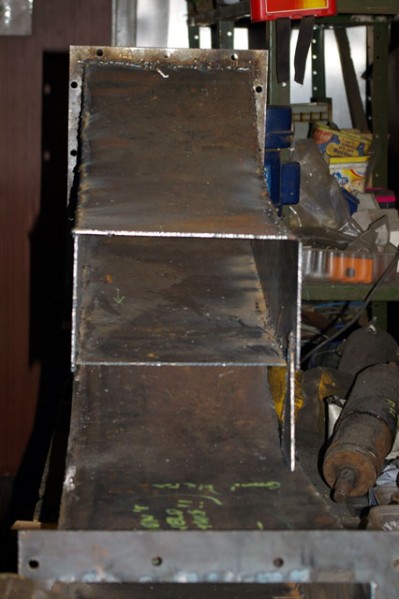 |
| Above : Another view of the TMB duct on the bench with the two indervidual duct branches now starting to become enclosed. © C15PS |
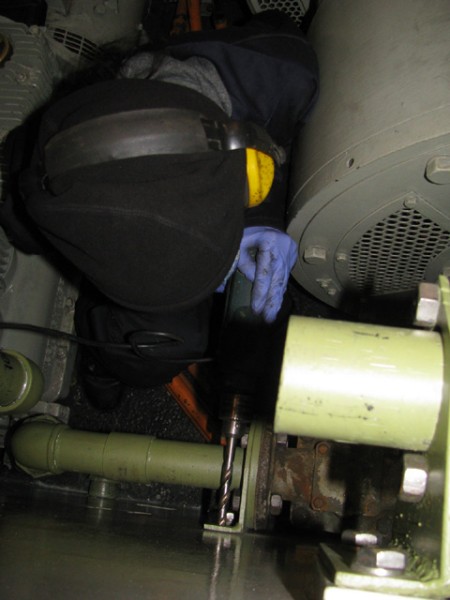 |
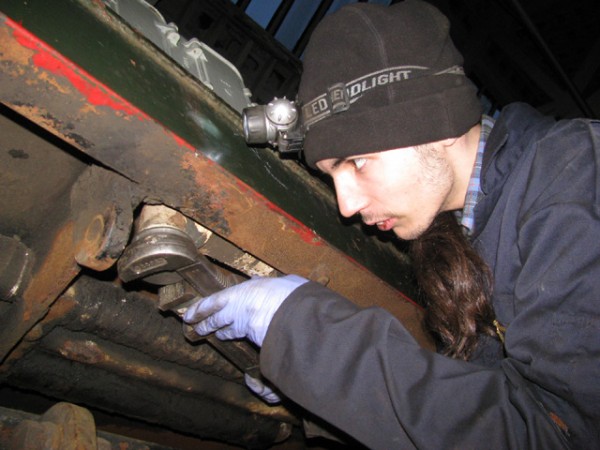
Above :
Stephen crouches down between the generator & L/H exhauster to drill one of the holes for the bulkhead mounting bracket. © C15PS |
 |
Above :
Jason uses the sabre saw to cut off the knobbly gas axe cut pipe ends on the vacuum train pipe above the R/H battery box. © C15PS |
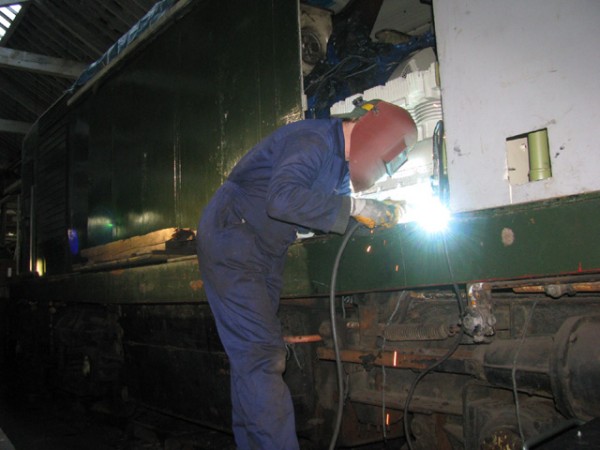 |
| Above : Jason is seen welding on the replacement stand pipe for the L/H exhauster silencer outlet. © C15PS |
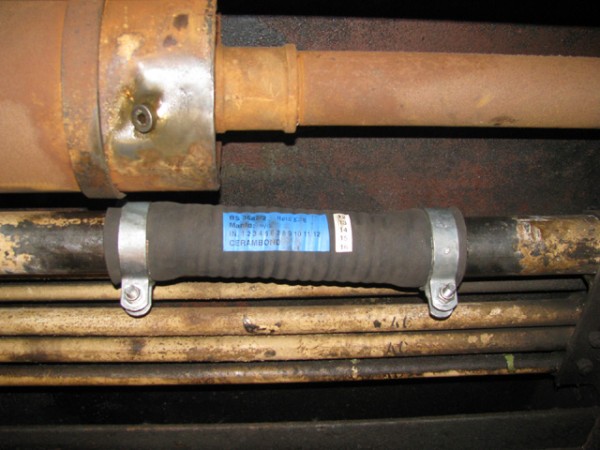 |
| Above : The gas axe gap has now been successfully repaired with the fitting of this new short length of vacuum hose. © C15PS |
 |
| Above : Stephen is seen using the large stilsons to tighten up one of the trip cock outlet blanking caps. © C15PS |
Fancy Getting Involved? click on the You Can Help page