13,14 & 16 April 2013
Saturday 13 th April Attendance: 2 +1? It was back to D8233 Vacuum system for Jason as he hoped to get the rest of the system connected up ready so that a Vacuum test on the loco could be performed, after his last session on the loco there had been a number of areas that still needed attention even though all the 2” steel pipework was now in position, to start off with some modifications were needed in the nose end compartment as after re-fitting the front buffer beam pipe and screwing up it nice & tight it had pulled the nose end stand pipe forward about half an inch, this caused the Deadmans valve that sits atop the stand pipe to fowl the internal framing of the nose end, so some clearance notches needed to be cut out, first Jason used a marker pen to mark out where the notch needed to go as the valve was still fitted it was easy to see where it would foul, next the valve was removed by unbolting, upon removing the valve it was noticed that the end section was mounted 90 degrees out, so Jason took the valve back to the workshop in the support coach and unbolted the end section and turned through 90 degrees to the correct orientation before bolting it back together, Next back at the loco Jason unbolted both of the R/H nose end marker lamp bowls as they were in the way and with them removed it game better access to the work area, Jason then got out the angle grinder with a slitting disc attached and nimbly chopped out a slither of frame metal to form the cut out notch then applied a quick slash of paint to seal the bare metal edges of the cut, then Jason fetched the ½ inch blanking cap to block up the small pipe that comes off the base of the stand pipe that goes to the Vacuum governor and Brake proportionality valve, for the purposes of a Vacuum test this needed to be blanked off, unfortunately the blanking cap did not seem to fit? Jason was puzzled for a time as he was sure that the fitting was ½ “BSP yet it seemed to be of a slightly smaller size? So he fetched the manual thread cutter and had to thread it on in reverse to clean up the threads, after this was done the blanking cap then fitted, so Jason screwed it on with plenty of PTFE tape, the Deadmans valve could then be refitted and aligned correctly making sure that the clearance notch did its thing, with that all now in place, Jason slapped on the gloss white paint to the stand pipe and refitted the nose end marker lamps. Next it was unto fitting the Vacuum hoses or Vac Bags as they are more commonly known in railway circles, by this time Stephen Smith had arrived with another bidding volunteer in tow whose name escapes me right now? Anyway after a quick cupper they fetched the Vac bags and fitting from the support coach and set up at the front end of the loco to fit the first Vac bag onto the front buffer beam, Jason first bolted on the dummy coupler to the hanging bracket, then using some Vaseline lightly lubricated the end of the vac pipe where the vac bag attaches too, then after a short discussion with Steve on which was the best way up to have the pipe clamps, they decided to have the clamp bolts on top then the pipe was attached and the clamp secured, one end done, the other end needed a pipe coupler attached, this was done with the pipe coupler mated with the dummy coupler, Jason then had to bend the pipe around and insert over the coupler while holding it in place while he nipped up the pipe clamp, some minor issues were found with the brass pipe clamps not overlapping properly but this was soon resolved with a quick trip back to the support coach to give the clamps a tweek then the front Vac bag was fully fitted, Steven then suggested that we plug it up to “Thomas” the ELR Replica Thomas the Tank engine (AKA No.32 Gothemberg) which was all but buffered up to the front of the 15, there was a slight gap in the buffers but the pipe did reach and connect successfully, which is probably the first time since 1969 that D8233 has piped up to another Railway vehicle on its front end, anyway after this small victory the pipe was disconnected again and stowed away on its dummy bracket while the guys moved to the other end of the loco where Steve fitted the dummy coupler onto the nagging bracket, the pipe was lubed up and test fitted but due to the dummy couplet hanging bracket being bent backwards the pipe was not fit on properly upon looking at the side profile it was obvious that the bracket had been clouted and moved back some time in the past so we needed to bring it forward… but as it was nearly 1 pm they decided to stop for some lunch. After lunch Jason had a plan on how to bend back the bracket, he nipped down to the workshop container to fetch the chain block, then using a small lifting strap attached it to the coupling hook on the vintage coach facing D8233 rear buffer beam, then by wrapping the chain around the bottom of the hanging bracket, Jason slowly pulled up the chain hoist and gradually it began to pull the bracket back into true, eventually Steve signalled when the bracket was straight and the chain block was released, now that the Vac hose could fit correctly the rear end vac bag was soon attached, next Jason & Steve moved onto the R/H exhauster pipework which needed some adjustments as there was a loose joint and some exposed bare metal pipes that had gone rusty since fitting, so with one stood on top and the other down below they each removed a pipe from the exhauster and returned to the support coach, a quick drell and a slap of primer paint was applied to the bare metal pipe before the other guy who had joined them had to depart, leaving Jason & Steve to return to the loco and start removing the pipes from the L/H exhauster, Steve soon discovered that one of the flange studs on the exhauster had stripped the threads so Jason found a replacement nut and using some mole grips removed the stud, re-cut the threads with a die and then screwed it back in the opposite way round, Steve then fitted the new Vac bag into position and both he and Jason started to collect the tools up and went back to the coach for a cupper to fetch some more tools to do another job only to go back to the works a few minutes later and find them all locked up and it was only 16:25, this was a cause of great consternation as the job on the loco was half finished with tools all over the place and the loco power supply plugged in and powered up? And when Jason asked around the steam department members none of them had a key to get into the works, so they were stuck, itching to get going but unable to get access to the job in hand? So they went down to the workshop container and made the adjustments to the exhauster pipes they had removed, they then returned to the coach and slapped some paint upon the pipes, after an hour or so of this a steam engine came back on shed and unlocked the works so Jason & Steve and now Phil Cribbin had dropped in after returning from a Trainee Secondman turn on 55022 and then assisted in the removal of one of the new TMB ducts at the No.2 end, this was returned to the coach, the tools were picked up and the power lead to the loco unplugged, and after trimming down another of the exhauster pipes and slapping on some primer paint the day's work was just about done, a final quickie Job Jason nipped into paddy and removed a duplex vacuum gauge that he removed from its mounting and gave a quick clean up and paint before calling time. Sunday 14 th April Attendance: 2 Phil Cribbin who had stayed overnight was up early with Jason to help do some painting first thing, Phil applied some white gloss to the two exhauster pipes while Jason got out the angle grinder and smoothed off all the knobbly welds that were on the small TMB duct before he wiped it down with some thinners and then got the Green primer paint and the mini-rollers out and began to paint it up, both inside and out, Phil gave Jason a hand with the duct and soon they were all painted up, they then went up the station for some breakfast, Phil then had to peel off and undertake a shunting course on the railway, leaving Jason to return to D8233 and more painting jobs, first he got out the gloss red and touched up the pipe clamp brackets on the buffer beams which he had found after some research should be red like the buffer beam and not white like the pipe, this was soon done, next Jason went around to the L/H exhauster and applied some undercoat to the pipe around there, he also painted up the pipework for between the valves around the centre section as best he could before touching up the pipes on the R/H side also, next he went onto the No.2 end and undercoated as much of the large TMB duct as he could get to without removing it, then he went up to Castlecroft to see a man about some crane brakes, only returning after he'd had some lunch. Next Jason re-attached the pipework to the R/H exhauster, next he fetched the Vac Bag and fitted the vac bag to the R/H exhauster, this then was the last piece of the jigsaw and all the 2” pipework is now complete on the loco, but there was still some pipes that needed more paint, most notably the 2” pipework in the cab, so Jason got out the white gloss and painted up all the vacuum pipework that can be seen in the cab, he then returned to the support coach and seeing that the primer paint on the small TMB duct was dry applied the undercoat to it, that pretty finished up the day's work for him aside from sorting out some temporary pipework for the Vacuum gauge to fit to the loco but that would be a job for another day. Tuesady 16 th April Attendance: 3 As the 2” Vacuum system on D8233 was all but complete, Chris Baily suggested that while Jason and he was around they might attempt to perform a Vacuum test on the loco, the plan involved using a set of 12v car batteries wired in series to give the 110v needed to run one of the Exhauster motors as full speed and evacuate the system, it could then be tested to see if it was Vac tight and could retain a stable vacuum over a given period of time, Jason went down to the container to collect up the car batteries and connecting cables and bring them up to the loco using the hand trolley, Chris then spent some time wiring them up in series while Jason attached the temporary vacuum gauge to the No.1 end cab brake valve stand pipe, a locomotive battery charger was set up and connected to the battery bank to help maintain the charge in the cells while they were in use, Chris and Jason were joined by Martin Ward who assisted them in the operation, it was felt that the low voltage test just too slowly rotate the motor was needed, so the L/H exhauster motor was connected up to just one of the car batteries, and it turned the motor slowly, next the full bank of 8 batteries was tried but when connection was made the motor still ran at the same slow speed it had done during the 12v test, the batteries were disconnected and upon going round with a multi-meter it was found that one of the batteries had gone down so it was switched out with a spare battery that they had bought with them, the next test saw the motor turn much faster but only for a short time, the speed soon slowed down as the batteries ran down, so it was decided to let them charge for a while. After some time charging the exhauster was run up again, however this time we had yet more battery failures as the current draw proved too much for some of the old batteries, eventually the attempt had to be abandoned, the batteries were taken back to the container, Jason went back to the support coach did some painting on some bits off D9537 before clearing up and departing for home, Martin & Chris went down to the workshop container and continued with the overhaul work of the auxiliary pump motors off D9537 so that ended the day's work on D8233. If you wish to lend a hand please contact Jim Gough |
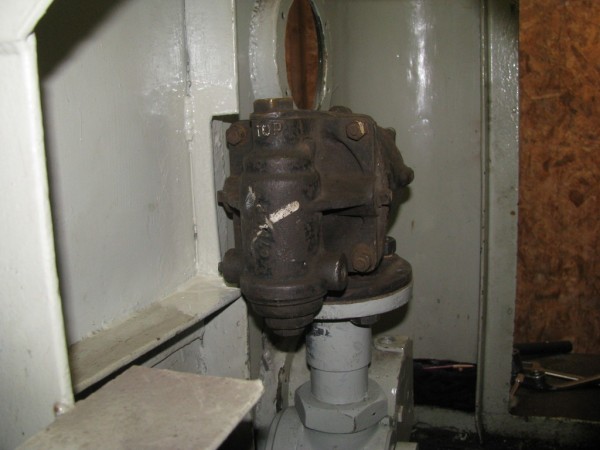 |
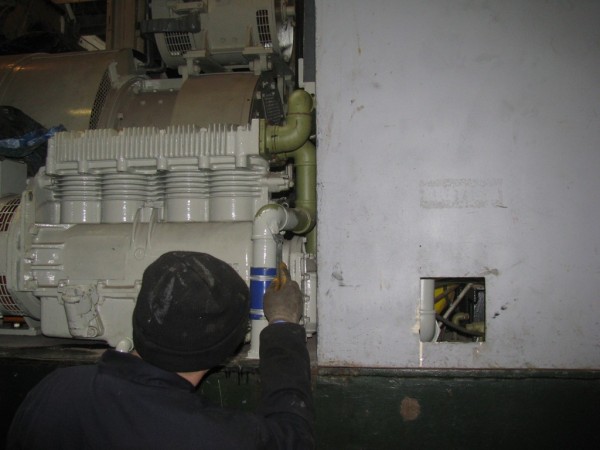
| Above : A clearance notch was cut into the frame for the Dead mans vacuum dump valve. © C15PS |
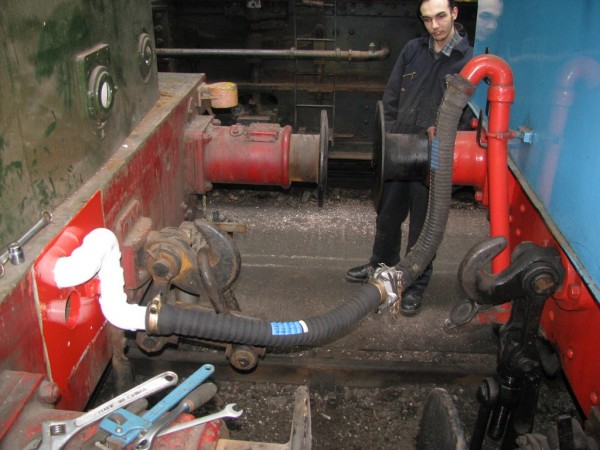 |
| Above : - "Thomas" was just within reach for a test coupling of the vac pipe, this is the first time since 1969 that D8233 has piped up to another rail vehicle at the front end. © C15PS |
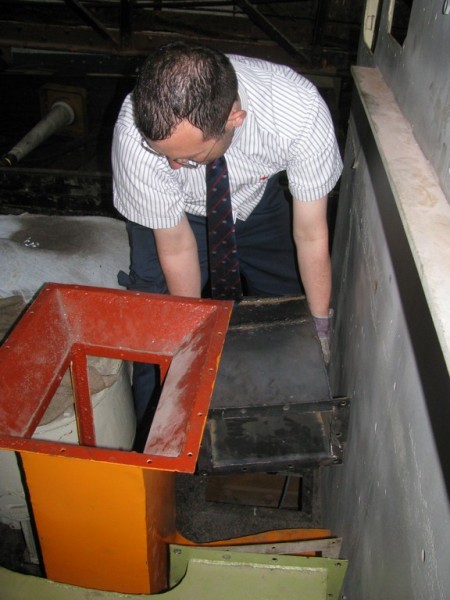 |
Above :
Phil Cribbin assists is removing the small No.2 end TMB duct for painting after it had been mock fitted.
© C15PS |
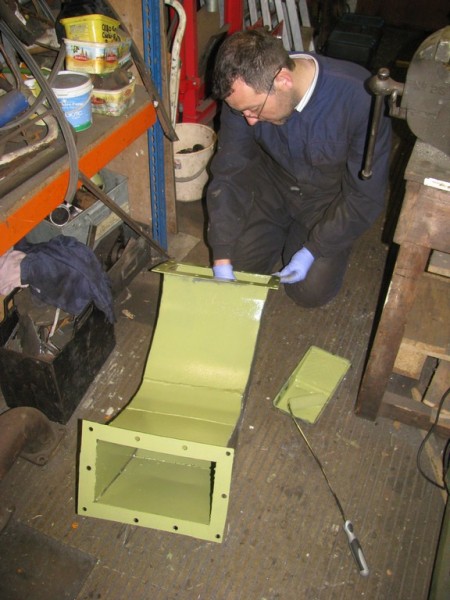 |
Above :
Phil is seen applying the initial coat of green primer to the small TMB duct.
© C15PS |
 |
| Above : Jason applies to the undercoat to the L/H exhauster pipework. © C15PS |
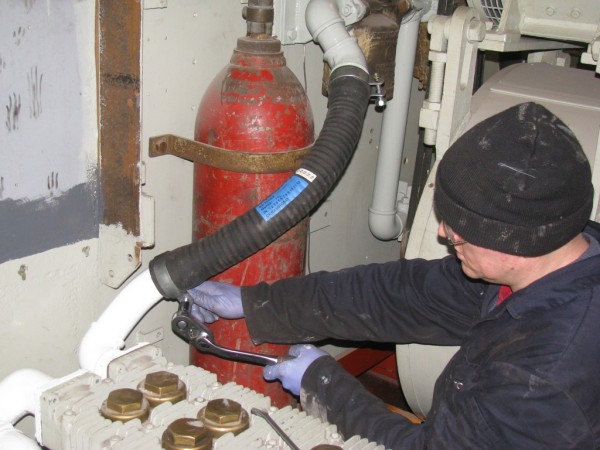 |
| Above : Jason bolts up the pipe clamp on the suction hose that attaches to the R/H exhauster. © C15PS |
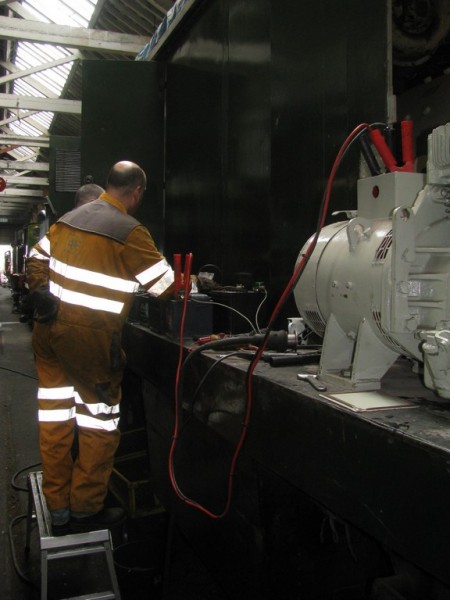 |
| Above : Martin Ward & Chris Baily asses the charge condition of the battery bank during the vacuum test. © C15PS |
Fancy Getting Involved? click on the You Can Help page